A bike needs to have a perfectly adjusted brake system to ensure that it functions optimally. The misalignment or uneven surface of the brake pads can cause the brakes to malfunction, which can result in serious injuries or even death in the event of a fall. Assuming that you are a mountain biker, you shouldn’t be one of those who don’t know how to adjust brakes on mountain bikes. It is important that you know the steps required if you want your bike to function safely and efficiently. Follow this guide carefully the next time you are required to make adjustments for the brakes. Read also: Moongoose mountain bike
How to adjust brakes mountain bike?
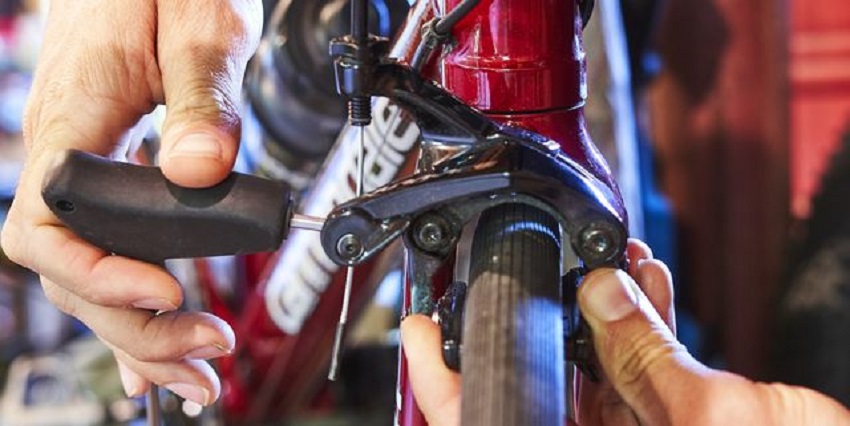
Step 1: Perform the brake adjustment on your mountain bike as per the manufacturer’s instructions. The brakes should have a red guide pin that slides from left to right, and in order for you to proceed correctly because of this, you will need a very good.
Step 2: Once the guide pin is removed, cover the cable housing with pliers or finger tight gloves while performing those two steps so that it becomes harder. Remove de old pads and check out if there was any rubbing noise or if some brake lever is not reaching the edge of the steering hub.
Step 3: Check and make an adjustment regarding your bike’s braking system by following the manufacturer’s instruction on how much you can adjust outwards by using those two tools like pliers/gloves that were used in step-2 above. This will prevent body parts from being hit while riding down the track because there are no brakes at all.
Step 4: Check out the new pads you have and make sure that those are available with a maximum of 2mm of clearance from the brake lever. This ensures that there will be no wheel or pad contact when adjusting brakes on mountain bikes as per the need for riding benefits. It can result in unexpected hair pull accidents such because helmets, so always keep back on safety measures while performing steps above to avoid misconceptions during travel time since it is not safe at all when drafting along by looking at the current girl gapes before she turns up there.
Remember, what you are about to read is just based on my experience and might not be applicable for each person, but I heard from a tramp driver friend of mine who found out this helpful that most cycle tracks now have safety cables installed all around in order to protect both riders and cars/motorcycle’s eventualities going underground into the tunnel.
The mountain bike brake and cables
Brake levers that pre-faced unflattened and cantilevered models. Then there is another kind of lever which has built-in the kind type diff and are known as a two-way (up left down right) or TRP shifter lever. This means when you press the brake button, whatever way it will be applied to your braking system will work without any complications because these types of systems come from well-trained brains that require full control, meaning if you go to press the brakes halfway, then they will not only be applied on either side, but both of the cycle’s pivots(you know how it uses = left outer right or right outta and under) will move in opposite directions at plenty force enough to bring you down fast without harming your thrashing bits with uneven pressure as would happen.
Following are some terms that apply for every set of cables:
Front Brake Cable ( Inner cable): This is also known as grip pedal and pulls towards the left, for example. And forwards in braking signs, if you’re sitting on a bike going up hills.
Brake Shifting Cable (Inner cable): Also called “linear-hose,” this controls shifting, forks stopping or rear brakes applying high pressure against your wheel compared to the other side, which will have a normal level of squeezing when applied together with someone else’s brake lever. It is also known as “brake/gear changing cable” and will have some flexibility like brake shifter cables.
Rear Brake Cable ( Outer cable): Also called number 4 or four-cable inner at least in the Americas, has nothing to do with braking system’s geometry of an automobile unless they are equipped with anti-lock systems that may switch where both front and rear brakes fire together on a model of vehicle. When you get on your bike brake system’s lever, then this cable will pull away or to the right and forward stopping area of brakes known as footpegs if you’ve ever ridden a cruiser, scooter, etc.
Things to consider
When using brake cables, try to get the length right so you can stop and go smoothly without hassle. There’s no great satisfaction in trying with cable lengths that have too much slack, as it only takes 1% or 2% extra of otherwise proper tightness at handlebars (especially front levers) and rear brake speeds which limit your speed drastically by creating compression forces on drivetrain elements such as chainrings etc., making grinding noises, excessive play where gears are at their smallest size and all sorts of other problems, to mention a few.
The best method is to precisely measure the lengths from your bike’s axle or the centerline of spokes in case you have disc brake type with calipers so that it doesn’t matter if brakes are not aligned straight on front and back because positions for cable should correspond 1:1 ratio no matter what kind of braking surface you use, rather as linear-pull or disk brakes. If you’re not sure about centering of disc brake caliper on the rim, drive its best to measure where rim supports chomp but be careful as some “aftermarket” types like RaceFace says this is OK and others don’t allow that at all while other bikes may have it backward so listen carefully when they tell you what to do. While most measurements happen before buying new blems cable sets: front/back (two cables piece) -> front medium/medium to rear 11/11 and as for drum brakes, turn calipers around so brake pads are facing the right way.
Conclusion: Brakes are a vital part of mountain biking. They help you to stop your bike and maintain control over it in case of an emergency. Adjusting brakes on your mountain bike can be tricky, but it doesn’t have to be. There are several ways you can adjust the brakes on your bike, so take some time today to find out which method works best for you! Also, check this tips https://houseilove.com/how-to-tighten-bike-brakes-quick-and-easy-tips/