Whether you’re a seasoned guitarist or a beginner just starting out, changing your guitar strings is an essential skill that every player should master. Not only does it keep your instrument sounding its best, but it also ensures a smooth playing experience. In this comprehensive guide, we’ll walk you through the process of changing guitar strings, step by step.
Mastering the Art of Guitar String Replacement: A Step-by-Step Guide
Step 1: Gather Your Tools
Before you begin, make sure you have all the necessary tools at hand:
- New guitar strings
- String winder
- Wire cutters
- Tuner
- Cloth or tissue
- Guitar neck support (optional)
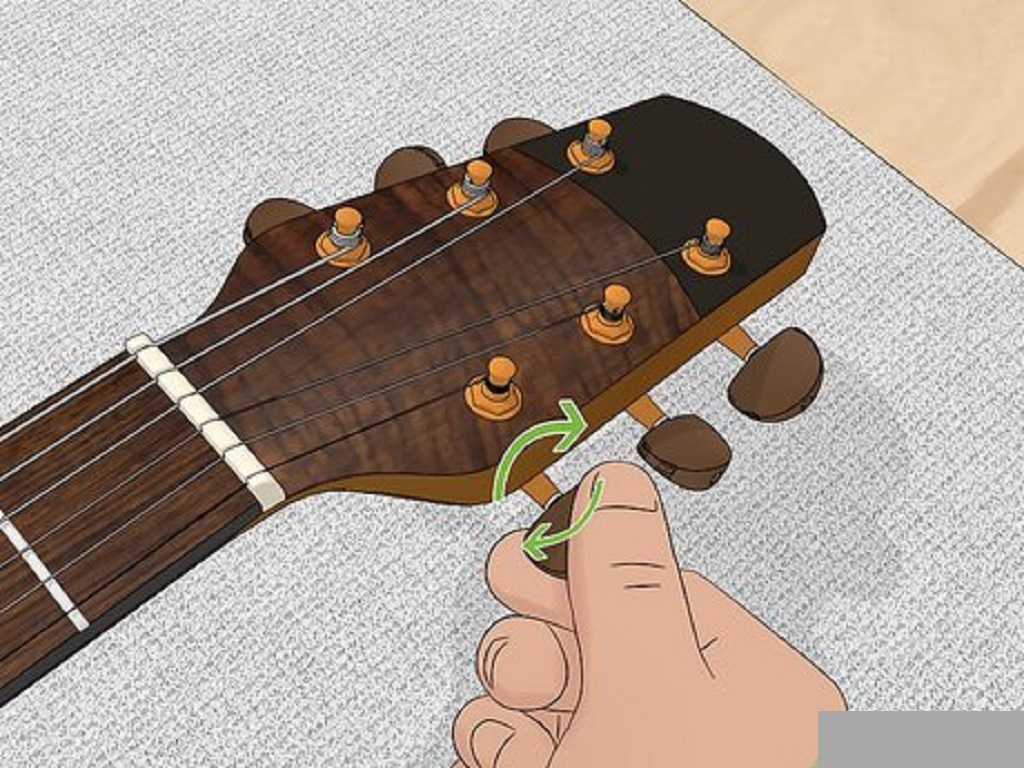
Step 2: Remove the Old Strings
Start by loosening the tension of the old strings using the tuning pegs. Once the strings are slack, use the string winder to speed up the process. Carefully remove each string, paying attention to how they are secured at the bridge and the tuning pegs.
Step 3: Clean Your Guitar
With the old strings off, take the opportunity to clean your guitar. Wipe down the fretboard and body with a soft cloth or tissue. This will help maintain the longevity of your instrument and keep it looking and sounding its best.
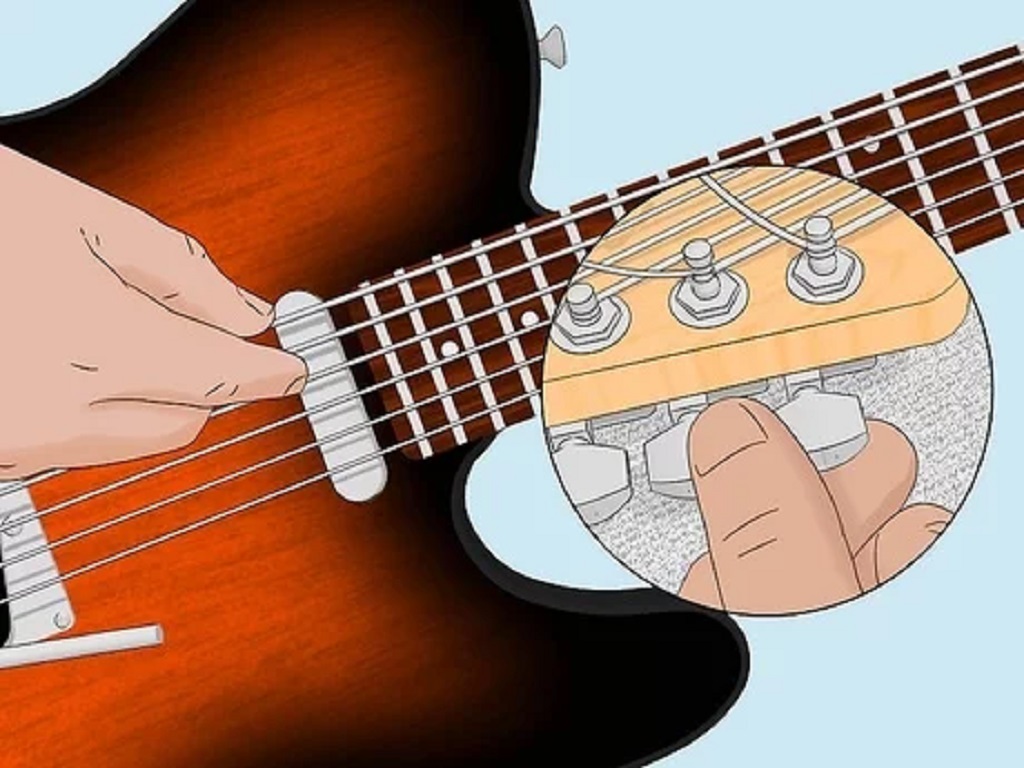
Step 4: Install the New Strings
Unpack the new set of strings and identify each one based on its thickness. Begin with the thinnest string (high E) and work your way to the thickest (low E). Thread each string through the bridge, making sure they are seated securely. Then, wind each string onto the corresponding tuning peg, leaving enough slack for tuning.
Step 5: Stretch and Tune
After the strings are attached, gently stretch each one by pulling it away from the fretboard. This helps the strings settle and ensures better tuning stability. Use a tuner to bring each string to the correct pitch, starting with the low E and working your way up.
Step 6: Trim Excess String
Once the strings are tuned, use wire cutters to trim the excess string from the tuning pegs. Be careful not to leave sharp edges that could scratch your hands or your guitar.
Step 7: Fine-Tune and Play
Give your guitar a final tune, making any necessary adjustments. Play each string to ensure proper intonation and tone. Congratulations! You’ve successfully changed your guitar strings.
Bonus Tip: Wrapping a Guitar for gift
If you’re planning to surprise someone with a new set of strings or an entire guitar, here’s a quick guide on how to gift wrap a guitar.
- Find a large, sturdy box that fits the guitar comfortably.
- Wrap the guitar in bubble wrap or tissue paper to protect it during transit.
- Place the wrapped guitar inside the box, ensuring a snug fit.
- Fill any remaining empty spaces with packing material to prevent movement.
- Seal the box securely with packing tape.
- Wrap the entire box in festive wrapping paper.
- Add a bow or ribbon for an extra touch of elegance.
Final Thought
Changing guitar strings is a skill every guitarist should possess, and with this step-by-step guide, you’ll be able to maintain your instrument with confidence. Explore the latest electrical gadgets and accessories for men, and if you’re contemplating the perfect gift, consider taking your time to enjoy the process – whether it’s selecting a cutting-edge device or thoughtful additions for a guitar enthusiast in your life, now you have the perfect knowledge to “wrap up” the perfect surprise!